Approve substrate, preparation, ink and post-processing together
Treat UV printing as a system: identify the acrylic grade and surface, cleaning or pretreatment, primer if used, ink and cure settings, artwork coverage, and every operation after printing. Approve finished production-intended samples and define a relevant adhesion review instead of accepting a generic statement that UV print is durable.
1. Start with the acrylic print-adhesion system decision
Treat UV printing as a system: identify the acrylic grade and surface, cleaning or pretreatment, primer if used, ink and cure settings, artwork coverage, and every operation after printing. Approve finished production-intended samples and define a relevant adhesion review instead of accepting a generic statement that UV print is durable.
A useful buying decision begins with the exact product configuration and customer task, not a generic claim about LED boards. For this topic, the controlled subject is the complete decoration stack on the production acrylic panel, including surface preparation and later fabrication. Record acrylic grade and surface, cleaning and pretreatment, primer identity, ink and cure process, artwork coverage, routing, polishing, cleaning and packing after print before comparing samples. Those facts determine whether two units are genuinely comparable and prevent a visible difference from being attributed to the wrong material, component, power source, or process. This record remains specific to the acrylic print-adhesion system decision.
A print that looks correct immediately after cure can still change after routing, cleaner exposure, flexing, packing contact or uncontrolled surface contamination. The review should therefore separate three questions: what the buyer needs, what the identified sample actually demonstrates, and which conclusion still requires qualified engineering, laboratory, or destination-market review. That separation gives procurement teams a defensible basis for a request for quotation without turning a short sample observation into a lifetime, safety, or compliance promise. This record remains specific to the acrylic print-adhesion system decision.
Before contacting suppliers about acrylic print-adhesion system, assign an owner to the commercial need, an owner to the technical evidence, and a person authorized to accept a trade-off. Give them the same one-page brief and require each comment to reference the sample code or specification field. This simple handover matters when the importer, brand, testing adviser, inspection company, and factory work in different locations. It prevents a merchandising preference from being reported as a regulatory rule and prevents an unresolved technical question from disappearing inside a general approval. Record the final decision, evidence reviewed, open items, and next review trigger in language a future replenishment team can understand. This record remains specific to the acrylic print-adhesion system decision.
- Name the exact model, panel, base, cable, marker set, and operating condition involved.
- Use correct appearance and adhesion after the approved production sequence and intended handling checks as the commercial decision rule.
- Record unknowns rather than filling them with catalogue assumptions.
2. Understand what can change the result
Ink adhesion depends on the substrate surface, contamination, pretreatment, ink chemistry, cure and post-print operations.
The acrylic print-adhesion system result belongs to an identified configuration
ACRYLITE notes that standard acrylic may need a primer for some UV-curable inks and that post-print routing can reveal adhesion problems; its printing guide also connects cleaning, fabrication stress and process order with defects. A buyer does not need to reproduce a material-science laboratory to manage this risk, but the quotation and sample plan must identify the variables that the factory controls. Ask which inputs are fixed by drawing or bill of materials, which depend on the production route, and which can vary with environment or operator technique. This record remains specific to the acrylic print-adhesion system decision.
Primary technical references in this guide explain the general mechanism or measurement scope; they do not certify a LumDigi model or create a universal acceptance limit. Use them to ask better questions, then rely on product-specific drawings, supplier declarations, samples, and suitable test evidence. This is especially important when a method developed for sheet material, a connector, a lamp, or an art material is being used only as context for a finished drawing-board assembly. This record remains specific to the acrylic print-adhesion system decision.
- Identify the physical mechanism before selecting an acceptance method.
- Keep acrylic grade and surface and cleaning and pretreatment visible in the sample record.
- Do not apply a source's grade-specific values to an unidentified finished product.
3. Build a sample matrix before testing
Compare deliberately selected configurations and document every input that could change the acrylic print-adhesion system result.
Create complete panels using the actual substrate, artwork and process order, with representative solid, fine-line and edge-near print areas plus any later routing or base insertion. Give each unit a sample code and retain the configuration record with photographs taken before the review. If a supplier proposes an alternate input, make it a separate matrix row rather than silently replacing the approved reference. This protects the buyer from approving one combination and receiving another. This record remains specific to the acrylic print-adhesion system decision.
Keep the matrix small enough to interpret. Change one significant variable at a time where practical, while holding art file, substrate lot, surface orientation, cleaning materials, ink system, cure setting and post-print sequence constant. Include a repeat unit when the commercial risk is lot consistency rather than a one-off demonstration. A buyer sample is evidence for a defined decision; it is not automatically a statistically representative production result. This record remains specific to the acrylic print-adhesion system decision.
- Use the same board shape and base unless one is the variable under review.
- Assign a sample code and photograph the starting condition.
- Retain an approved reference for production and shipment comparison.
4. Use a repeatable review method
Review initial appearance, then apply only the buyer-defined relevant handling or adhesion method to coded finished samples.
Inspect print under neutral light, photograph artwork boundaries, complete the intended routing and assembly steps, apply the agreed non-destructive or separately defined test, and record affected areas without hiding damage. Write the sequence before viewing the result so observers do not change the method after seeing a preferred sample. Record setup, duration, handling, power source, room condition, and any cleaning or reset step that could influence the next observation. This record remains specific to the acrylic print-adhesion system decision.
Capture color and registration, pinholes or contamination, edge lift or flaking, change after approved handling, contact or abrasion from the base and pack. Use neutral photographs and short unedited video where motion or control behavior matters, and label every file with the sample code. Do not enhance glow, hide a defect with exposure, or crop away the cable and base when those elements are part of the question. Installation preparation should use only the proposed accessories and a stable, ordinary application setup. This record remains specific to the acrylic print-adhesion system decision.
- Write the observation sequence before the review begins.
- Use ordinary application conditions plus any separately defined technical condition.
- Label photographs and video with the sample code and configuration.
5. Interpret observations without overclaiming
A passed in-house check supports the defined sample decision but is not a universal chemical, abrasion or lifetime claim.
A sample review can show whether the observed configuration meets the buyer's stated task under recorded conditions. It cannot by itself establish every production unit, every environment, or an unspecified service period. Do not state scratch proof, solvent proof or permanent without a defined claim, representative specimens and appropriate evidence. If the buyer needs a measured value or regulated conclusion, define the applicable method, specimen, equipment, laboratory competence, and report before assigning a limit. This record remains specific to the acrylic print-adhesion system decision.
Use three result states: accepted for the defined purpose, rejected against a written criterion, or open pending evidence. Avoid labels such as premium, safe, durable, uniform, or compliant unless the claim has a defined meaning and support. Where two configurations both work, preserve the trade-off rather than forcing a winner. The best sourcing choice is the one that meets the customer requirement with controllable production and truthful product communication. This record remains specific to the acrylic print-adhesion system decision.
- Separate visual preference, functional acceptance, and measured evidence.
- State conditions and limits beside every result.
- Escalate safety or regulatory conclusions to qualified reviewers.
| Decision field | Record in the buyer file |
|---|---|
| Substrate | Grade, face, finish, cleaning and pretreatment |
| Artwork, primer, ink, cure and orientation | |
| After print | Routing, assembly, cleaning, packing and approval method |
6. Translate the decision into the RFQ
Convert the chosen acrylic print-adhesion system condition into named product fields, sample references, evidence requests, and change controls.
The RFQ should identify acrylic grade and printed face, surface preparation, primer and ink system, cure and artwork revision, post-print operations, adhesion and appearance approval method. Attach the sample matrix, approved photographs, and any drawing or artwork revision needed to make those fields unambiguous. Ask the supplier to mark confirmed, conditional, optional, and unsupported points. This produces comparable quotations and prevents an attractive reference image from becoming an unintended specification. This record remains specific to the acrylic print-adhesion system decision.
Request the proposed evidence with the quote: material or component identity, current datasheet where relevant, sample lead time, change-notification route, and the inspection checkpoint that will confirm production. Use LumDigi's custom design process for shape and presentation discussions, review a relevant shaped LED board reference, and send the controlled brief through the B2B enquiry page. Availability and final specifications must be confirmed for the selected model. This record remains specific to the acrylic print-adhesion system decision.
- Attach the approved reference and configuration matrix.
- Request a response against every field instead of a generic confirmation.
- Define which substitutions need written buyer approval.
7. Carry the approved condition into production
Control the inputs that produced the approved sample, and route any material or process change through a documented review.
Production control should cover substrate identification, cleanliness, primer application, ink lot and cure, artwork file, post-process handling. Link each checkpoint to a drawing, bill-of-material line, approved sample, work instruction, or recorded setting rather than relying on memory. If a change affects the mechanism discussed in this guide, pause and evaluate it against the approved decision before allowing the new condition into the order. This record remains specific to the acrylic print-adhesion system decision.
Factory testing should answer the commercial question with a repeatable method and traceable units. It should not be described as third-party certification unless it genuinely is. Retain representative evidence from start-up, in-process review, and the production lot where the risk justifies it. For a custom shape or private-label set, synchronize the panel, base, marker, cable, insert, and pack revisions so a correct component is not assembled into the wrong configuration. Compare the evidence plan with this related buyer guide before final approval. This record remains specific to the acrylic print-adhesion system decision.
- Link process checkpoints to the approved sample and current drawing.
- Record start-up and in-process observations for the identified lot.
- Keep corrections and concessions traceable to authorized decisions.
8. Verify the shipment-level evidence
Use the approved acrylic print-adhesion system condition in the pre-shipment plan, with traceable samples and an explicit release route.
Shipment inspection can check artwork and color reference, registration, pinholes or contamination, edge lift or flaking, print damage from assembly or packing, using the buyer's approved references and sampling instruction. The report should identify the lot, selected units, method, actual observations, photographs, limitations, and disposition. A pre-shipment check is valuable commercial evidence, but it does not replace material qualification, laboratory testing, or regulatory assessment required for the destination market. This record remains specific to the acrylic print-adhesion system decision.
When a finding occurs, describe it against the requirement and separate observation from cause. Define correction, reinspection, concession, or hold authority before shipment release. Archive the report with the purchase order, change notices, and approved sample. This creates a practical trace from customer requirements to production and reduces disputes built on unlabeled photos or recollection. This record remains specific to the acrylic print-adhesion system decision.
- Identify the inspected lot, variant, unit, and evidence file.
- Record findings against written criteria rather than impressions.
- Define reinspection or hold action when the evidence is incomplete.
9. Conclusion: make acrylic print-adhesion system a controlled buying decision
A reliable acrylic print-adhesion system decision combines a defined customer need, an identified sample, controlled production inputs, and honest claim boundaries.
Print adhesion belongs to a defined material and process stack, not to the words UV printed alone. The process is intentionally narrower than a broad product claim: define the need, compare identified configurations, record the method, and translate the decision into production and inspection controls. That sequence gives retail, distribution, and private-label teams information they can explain accurately to colleagues and customers. A supporting procurement guide can be used to align the adjacent buying decision without collapsing two specifications into one. This record remains specific to the acrylic print-adhesion system decision.
For LumDigi, send the target market, channel, preferred board shape, power arrangement, marker set, quantity scenario, packaging direction, and the specific acrylic print-adhesion system question. LumDigi can confirm facts for offered configurations and organize a relevant sample discussion. Buyers remain responsible for destination-market decisions and should use qualified reviewers where standards, safety, legal, or laboratory conclusions are required. This record remains specific to the acrylic print-adhesion system decision.
- Approve a configuration, not an isolated photograph.
- Carry the same facts into product data, packaging, and inspection.
- Reconfirm evidence after a relevant material, component, or process change.
Frequently asked questions
What should a buyer specify about acrylic print-adhesion system?
Specify acrylic grade and printed face, surface preparation, primer and ink system, cure and artwork revision, post-print operations, adhesion and appearance approval method. Attach the identified sample and state which fields are requirements, preferences, or open questions.
Can one sample prove every acrylic print-adhesion system result?
No. A sample can support the defined decision under recorded conditions. Do not state scratch proof, solvent proof or permanent without a defined claim, representative specimens and appropriate evidence. Production consistency, lifetime, safety, and regulatory conclusions need evidence appropriate to those separate claims.
Which changes should trigger a new review?
Review changes to substrate identification, cleanliness, primer application, ink lot and cure, artwork file, post-process handling. The buyer and supplier should agree which changes require notification, a comparison sample, updated documents, or qualified assessment.
What belongs in shipment inspection?
The plan can verify artwork and color reference, registration, pinholes or contamination, edge lift or flaking, print damage from assembly or packing against approved references. It should identify the lot, method, selected units, findings, limitations, and authorized disposition.
Image planning for this topic
These notes document the role and intended context of the two visuals used in this guide.
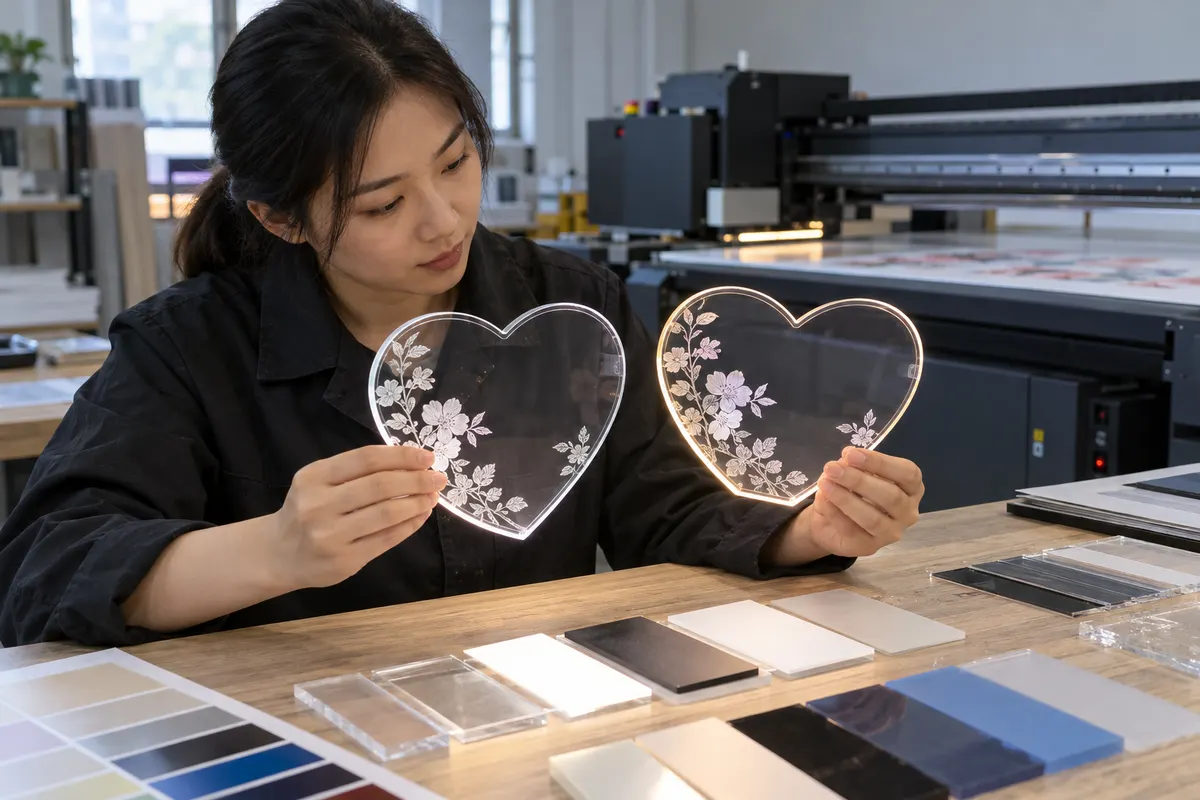
Review printed samples
- Placement
- hero
- Caption
- Illustrative AI-generated photograph: a Chinese print engineer compares decorated acrylic panels after the full process sequence.
- ALT text
- Chinese engineer comparing UV-printed acrylic LED panel samples
View AI image direction
Use case: photorealistic-natural. Asset type: editorial photograph for a LumDigi B2B LED acrylic drawing board technical guide. Chinese print engineer at a clean workshop table compares two transparent heart-shaped acrylic panels with restrained white floral UV printing, beside plain ink and substrate sample cards with no brand text; UV flatbed printer in background. Landscape 3:2 composition, candid documentary commercial photography, natural modest lighting, realistic transparent acrylic, restrained plausible LED glow, genuine workshop or sample-room texture, believable anatomy. If employees appear, every employee is a Chinese/Asian adult. No invented logos, certification marks, readable documents, readable instrument values, numerical test results, watermark, or text overlay. This is an illustrative planning scene, not proof of an actual LumDigi test, factory result, shipment, or customer project.
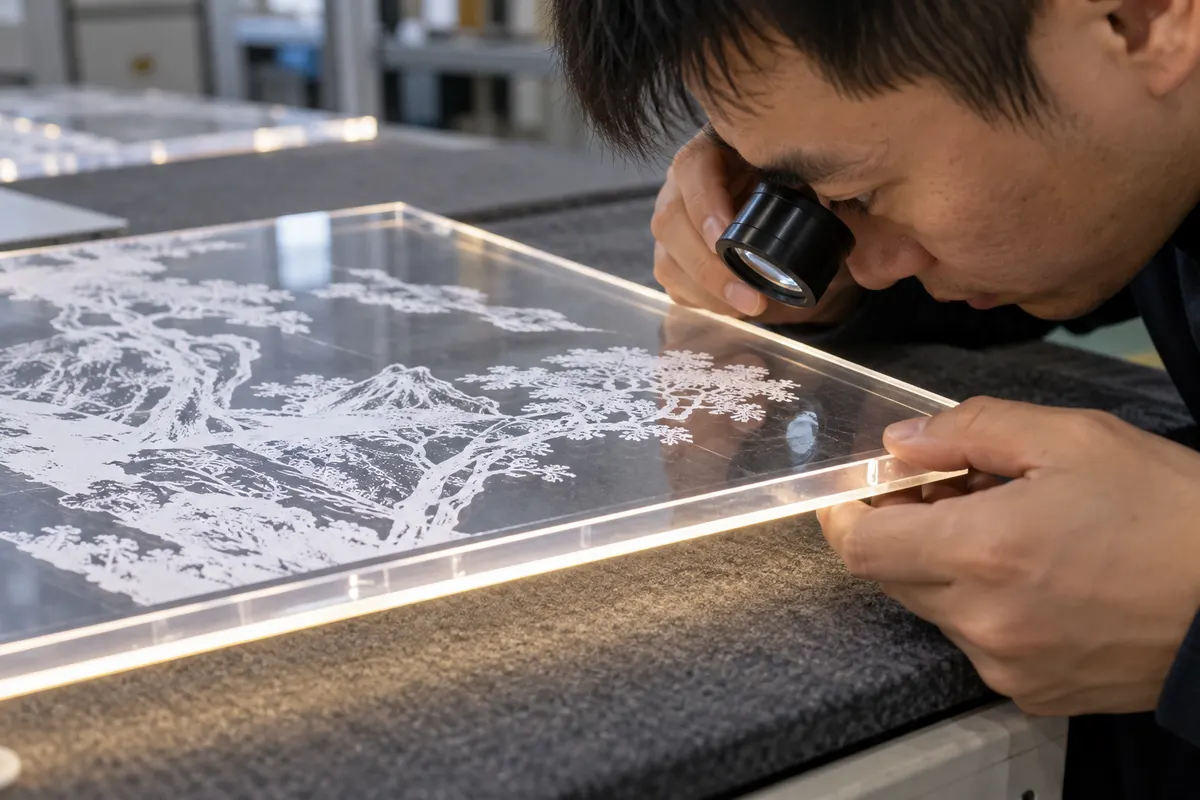
Inspect artwork edges
- Placement
- after-second-section
- Caption
- Illustrative AI-generated photograph: a technician checks fine printed edges and the base-contact area under magnification.
- ALT text
- Chinese technician inspecting print adhesion on an acrylic LED panel
View AI image direction
Use case: photorealistic-natural. Asset type: editorial photograph for a LumDigi B2B LED acrylic drawing board technical guide. Close documentary photograph of Chinese technician hands using a small magnifier to inspect the boundary of white printed artwork and the unprinted base-entry zone on a clear acrylic panel over a neutral mat. Landscape 3:2 composition, candid documentary commercial photography, natural modest lighting, realistic transparent acrylic, restrained plausible LED glow, genuine workshop or sample-room texture, believable anatomy. If employees appear, every employee is a Chinese/Asian adult. No invented logos, certification marks, readable documents, readable instrument values, numerical test results, watermark, or text overlay. This is an illustrative planning scene, not proof of an actual LumDigi test, factory result, shipment, or customer project.
Turn the article into a practical sourcing brief
Use the checkpoints above to document the product, evidence, packaging, and approval decisions relevant to your market. A clear brief helps suppliers respond to the same commercial question and gives your team a traceable basis for the next step.
Useful external references
- ACRYLITE: print adhesion FAQ
Manufacturer FAQ explaining that ink adhesion depends on grade, primer and post-print processing.
- ACRYLITE: painting and printing on acrylic
Primary fabrication guidance on preparation, printing variables and crazing risks.

Laser-Engraved vs Surface-Printed Acrylic Artwork: A Custom LED Board Buying Guide
A customization guide for brands choosing a permanent graphic method without confusing a sample effect with a guaranteed finished-product result.
Read article
LED Drawing Board Artwork Approval Checklist for Private-Label Buyers
A practical B2B guide for private-label buyers, brand managers, and packaging reviewers who need to review logo use, product graphics, packaging files, variant identity, and production proofs without allowing visual changes to hide configuration mistakes.
Read article
Custom LED Drawing Board Artwork Proof Guide
A practical B2B guide for private-label brands and packaging teams who need to approve artwork proofs against the named board, set contents, pack and revision record.
Read article
Engraving Pattern Pitch for Even Glow on LED Acrylic Boards
An optical artwork guide for balancing near-source brightness, remote-feature visibility and unlit appearance on shaped drawing boards.
Read article